C# is undoubtedly among the most popular programming languages used for coding and software development. This guide will cover the basics of web scraping involving C# framework called ScrapySharp and .NET core.
We have concluded that ebay.com will be a perfect demonstration resource for C# scraping. It contains products subdivided into categories. In this tutorial, we are going to focus on scraping PlayStation products.
Summary of the article:
- Introduction to ScrapySharp
- Preparation
- How to scrape with C# and ScrapySharp
- Step 1 - Configure debug settings
- Step 2 - Add ScrapySharp package
- Step 3 - Import Dependencies
- Step 4 - Write a function for getting the HTML Content
- Step 5 - Identify and parse the data elements
- Exporting data into CSV format
- The entire code snippet
Introduction to ScrapySharp
ScrapySharp is an open-source web scraping tool used in C# programming. Besides, it is a NuGet package which contains a web client, capable of imitating a web page and HTMLAgiltyPack extension, which comes with an option to select HTML elements using CSS selectors. ScrapySharp is quite effective in simplifying the scraping procedure in general.
Preparation
Please make sure you have all the necessary software installed, as listed below:
- Visual Studio Code.
- .Net core.
- C# extension in Visual Studio Code.
Got everything covered? Great! Let’s proceed with C# web scraping.
How to scrape with C# and ScrapySharp
The first thing you need to do is create a new project directory and name it, for instance “ScrapySharp_Scraper”. Use the VS Code terminal and create a new console app for our project in the newly created directory. To do so, run the following command:
dotnet new console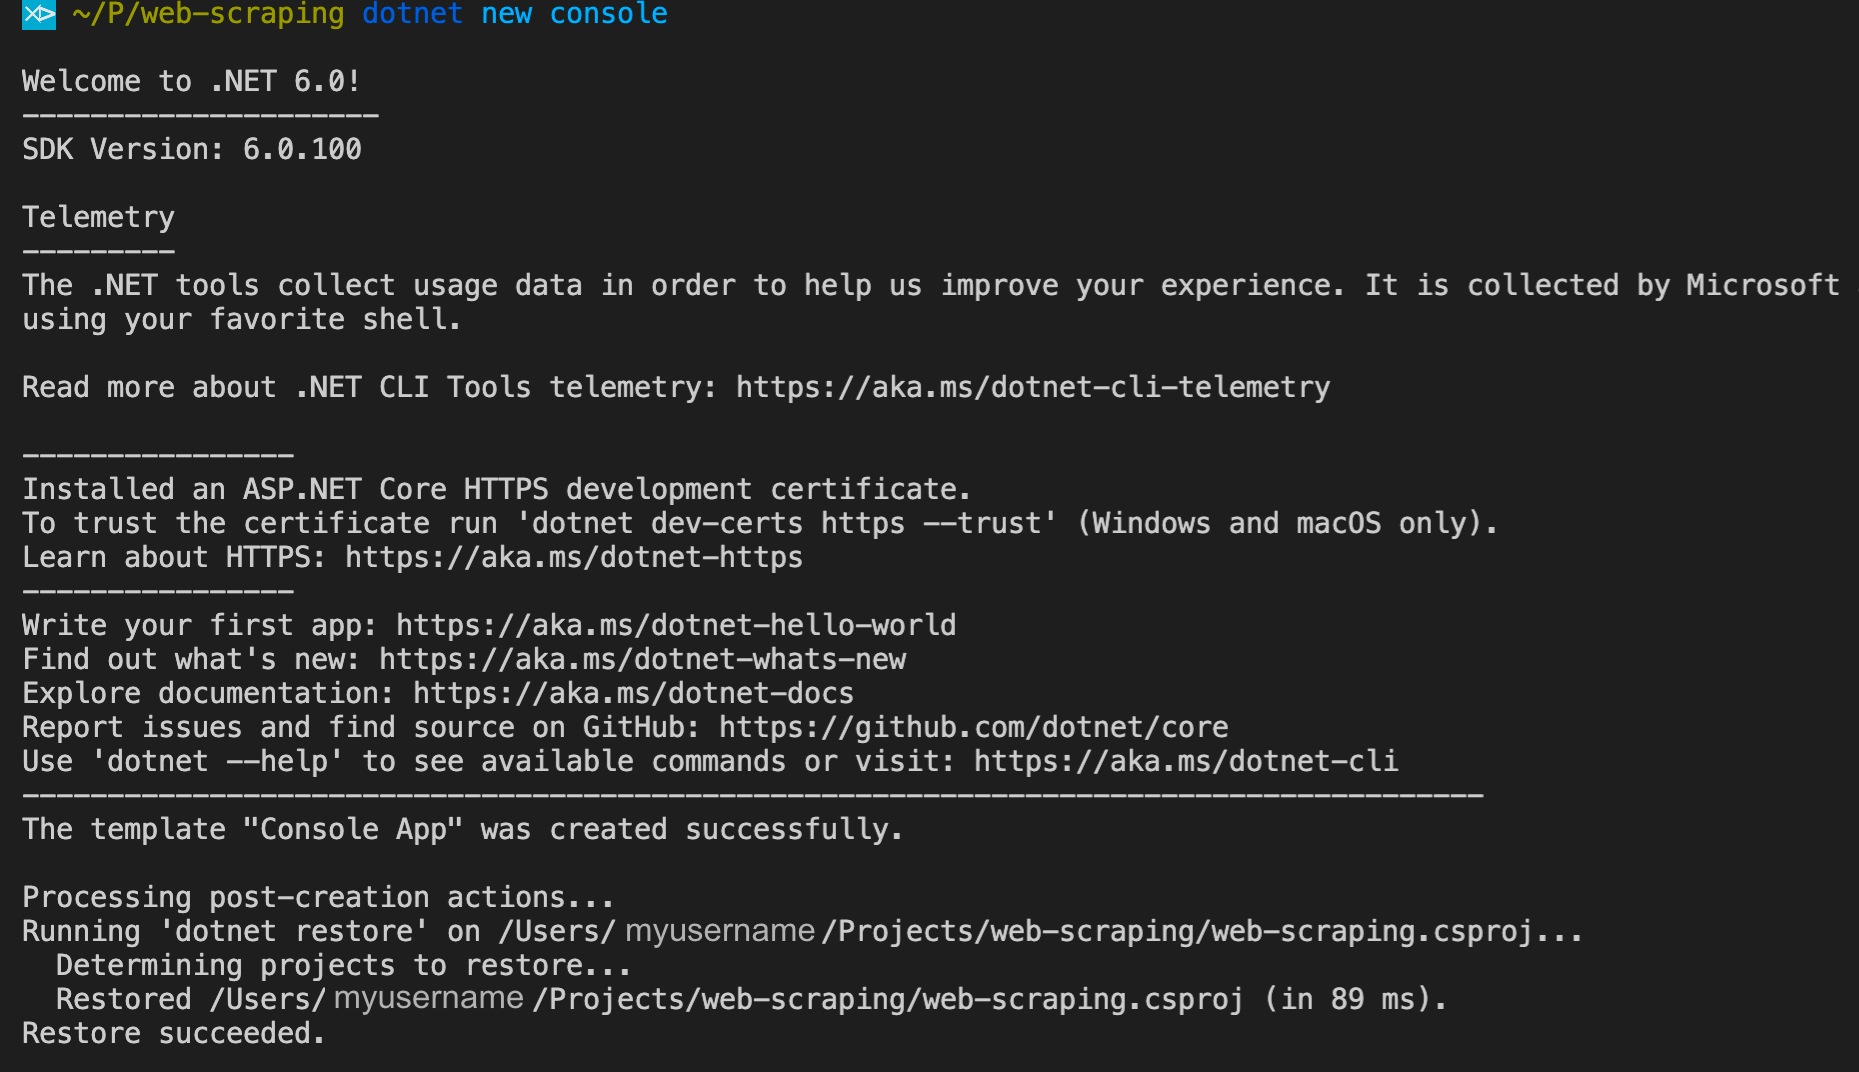
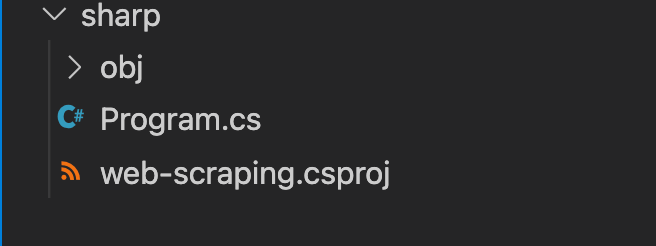
You will see that new project files have been created, Program.cs amongst them. This file is essential since all our coding will be done within it.
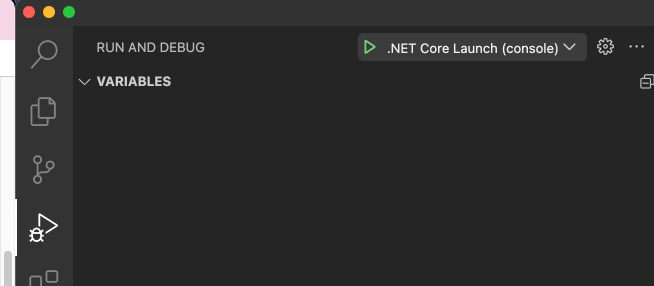
You need the launch.json file to modify debug settings and run the scraper. You can obtain it by choosing the Debugger icon in the VS Code side menu and clicking “create a launch.json file”.
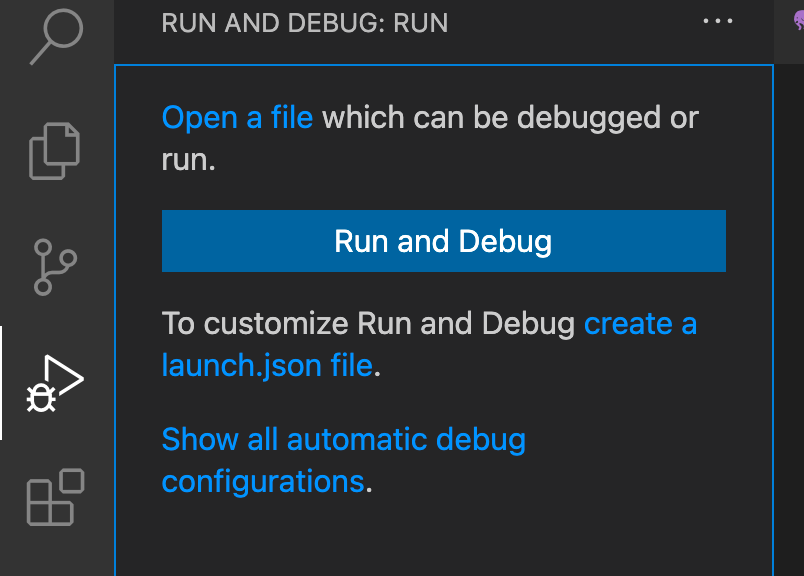
Take notice that .Net Core Launch (console) is selected as a default debugger in the drop-down menu (see the screenshot below)
In order to open your launch.json file, you have to click on the Settings icon next to the drop-down menu.
launch.json file
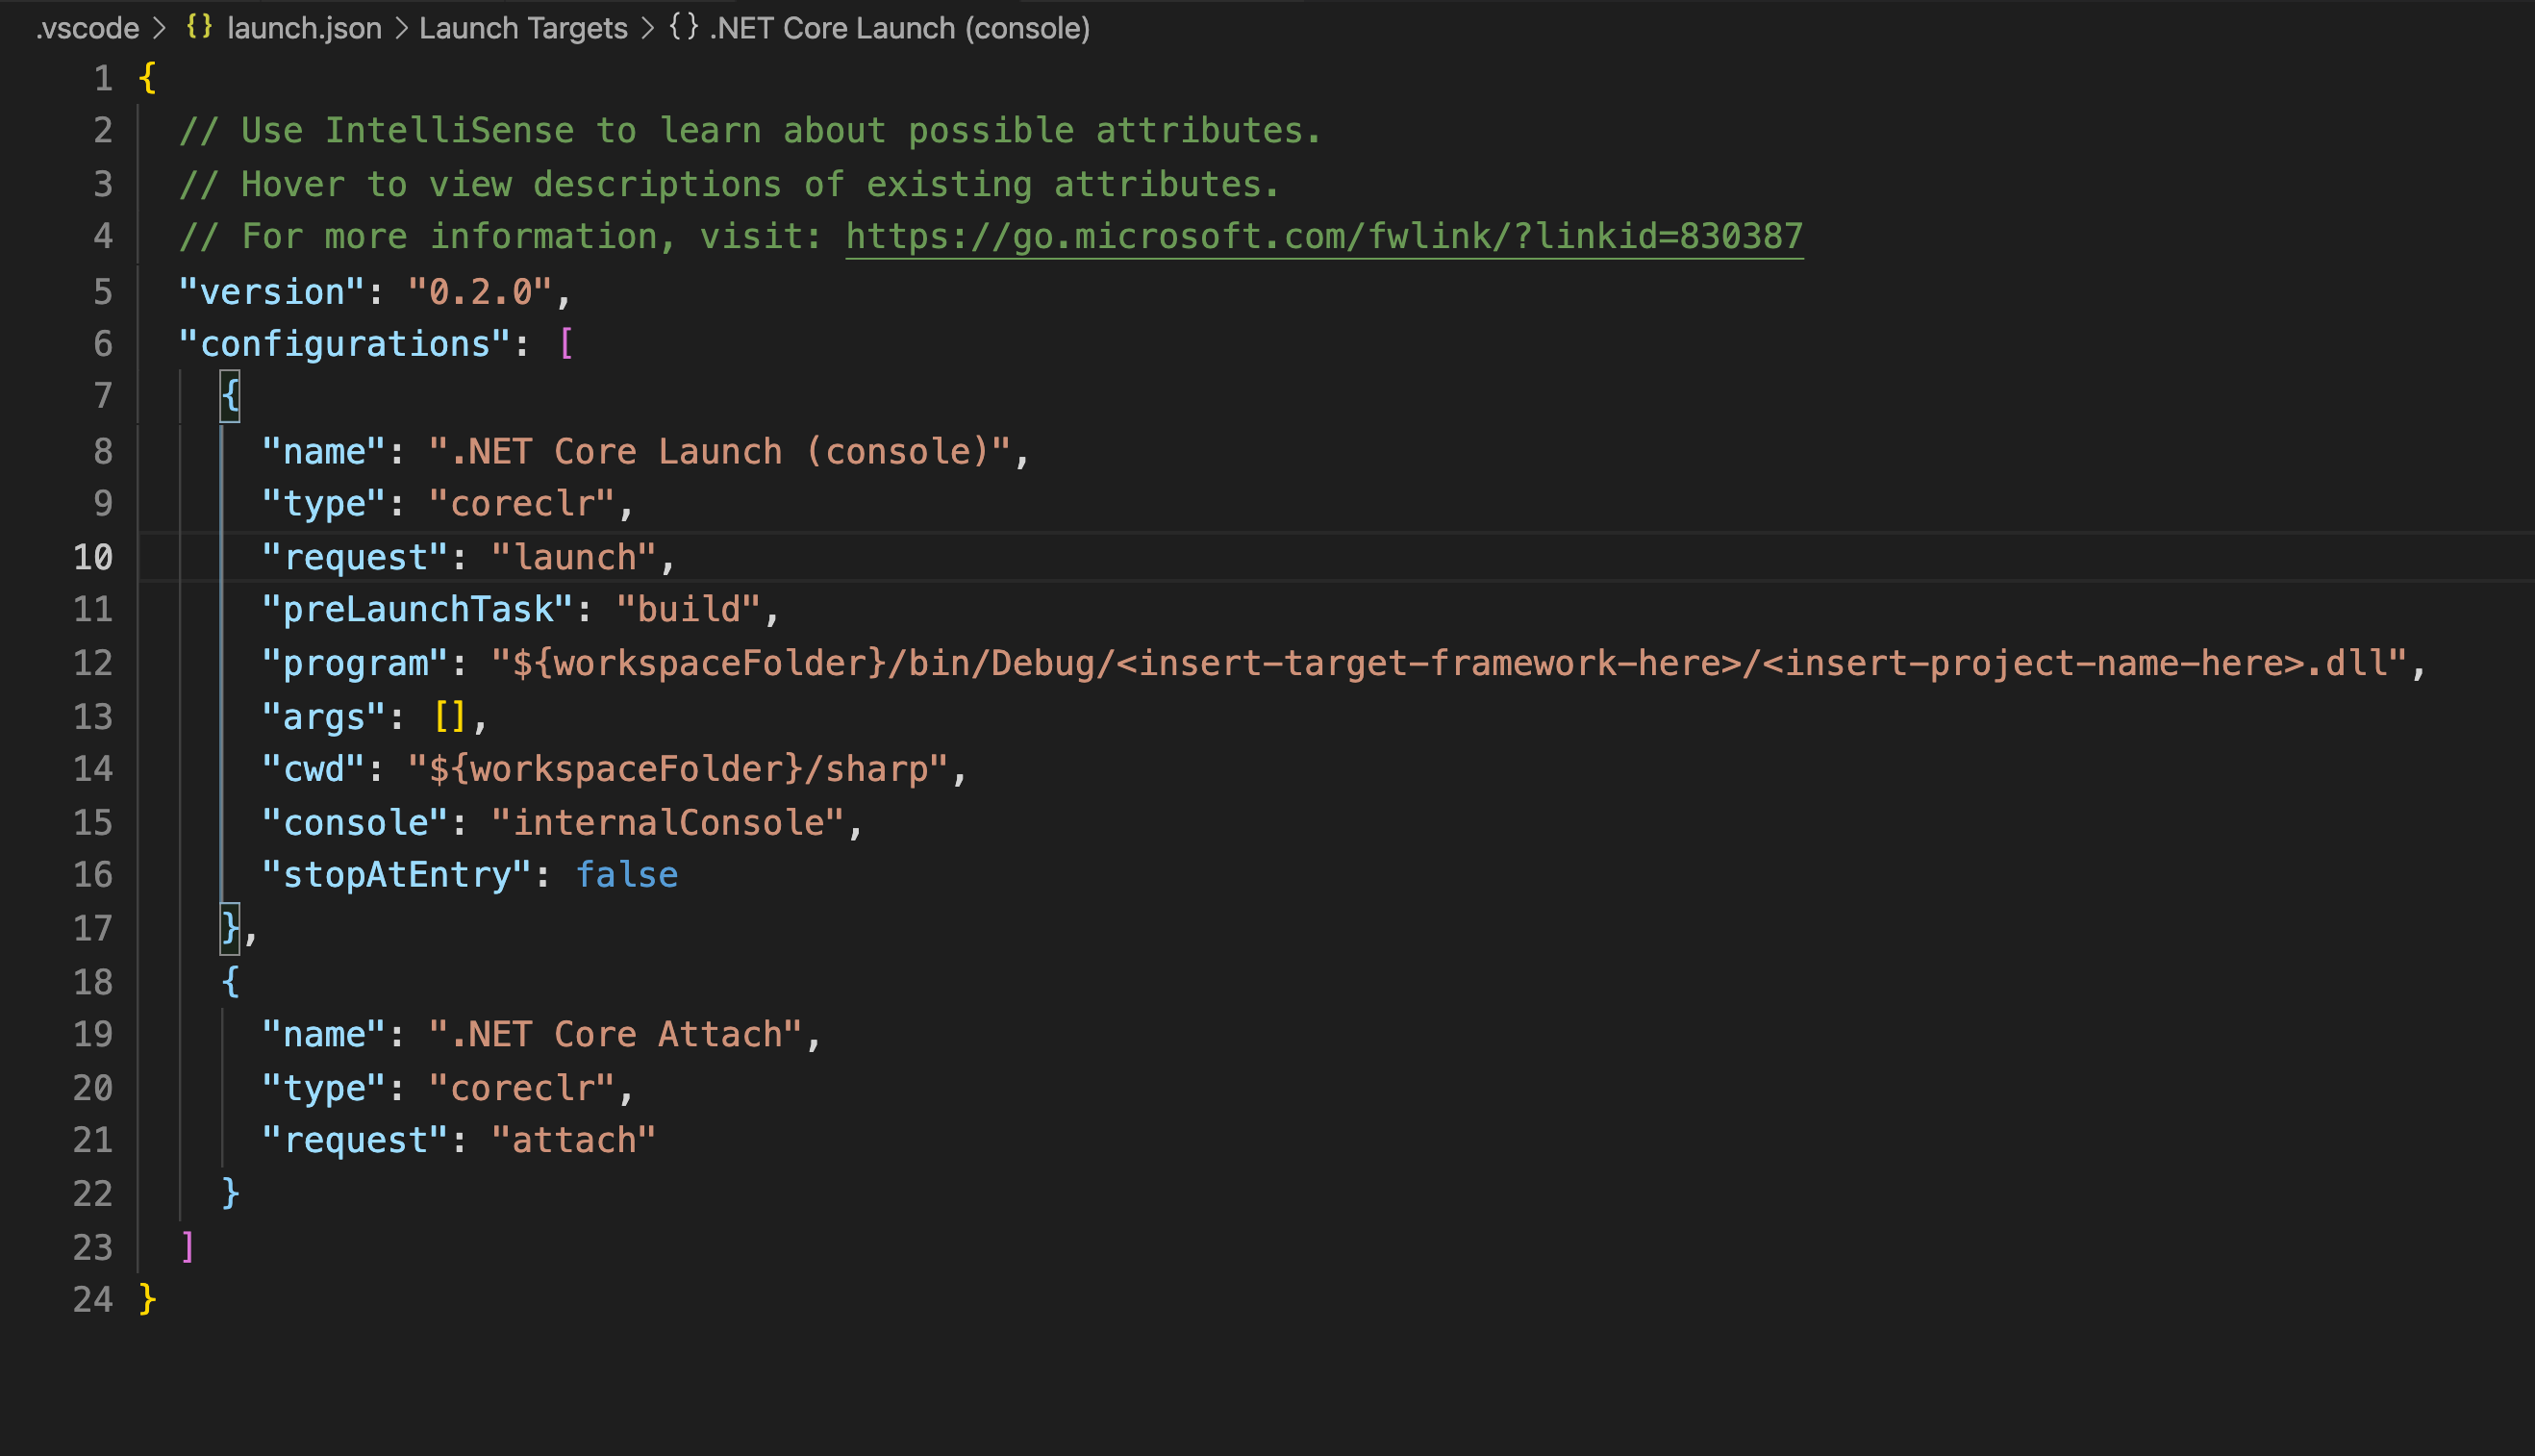
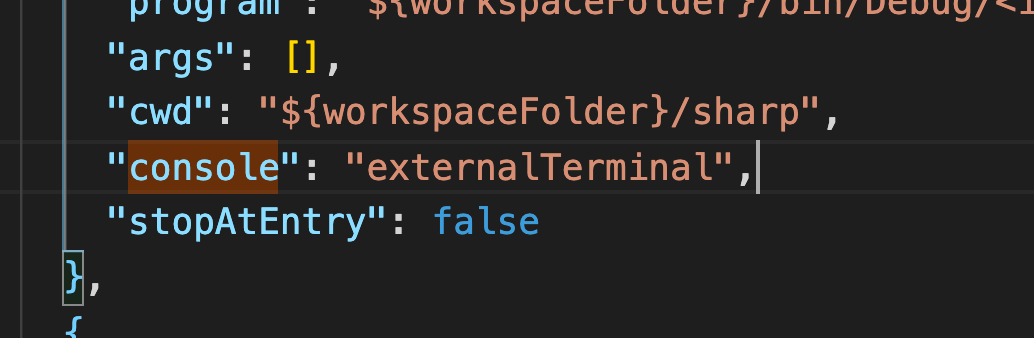
It is important that you switch the “console” property from “internalConsole” to “externalTerminal”. You need this to enable capture of the inputs.
Try testing your configurations by clicking the play button.

If everything is properly configured, a terminal or a command prompt with the output “Hello World!” shall be launched. If your output in an external command line resembles our example, as provided below, it confirms a successful configuration of your debugger.
Step 2 - Add ScrapySharp package
Next step is to integrate the ScrapySharp Nuget package into the application. Simply run the following command in the VS Code terminal:
dotnet add package ScrapySharp
Step 3 - Import Dependencies
Let’s now import the required dependencies to the Program.cs file.
IMPORTANT: Once the application is created, the “using System;” statement will be generated. The dependencies MUST be added under the “using System;” statement for the code to execute properly.
using System;
using System.Collections.Generic;
using HtmlAgilityPack;
using ScrapySharp.Extensions;
using ScrapySharp.Network;
The next code will create an instance of the ScrapySharp ScrapingBrowser. You will need it to replicate the behavior of a real browser so you can access web pages without complications.
Note that you will need to deploy this feature for several purposes. Therefore it will have to be created above the Main method (in the global scope).
static ScrapingBrowser _scrapingbrowser = new ScrapingBrowser();Step 4 - Write a function for getting the HTML Content
Now we need to acquire the desired HTML content from the target web page with the ScrapingBrowser object. In order to do so, we have to create a function called GetHtml(). Another function we need to use is NavigateToPage(), a component of the ScrapingBrowser object. It will return the HTML content of the target webpage once we pass the URL to it.
static HtmlNode GetHtml(string url){
    WebPage webPage = _scrapingbrowser.NavigateToPage(new Uri(url));
    return webPage.Html;
}
Step 5 - Identify and parse the data elements
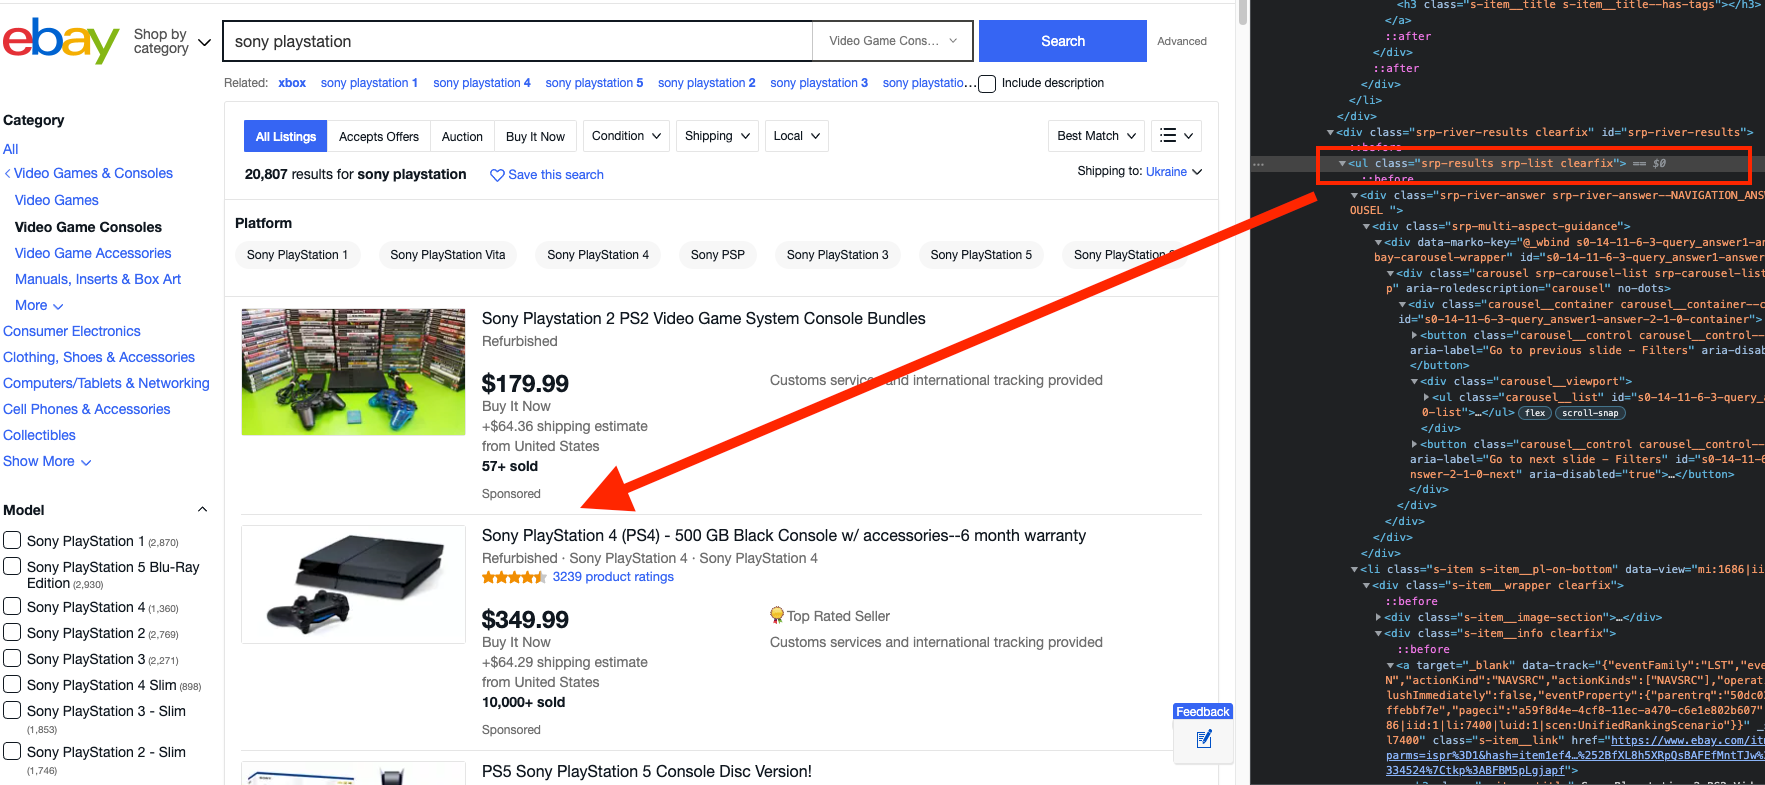
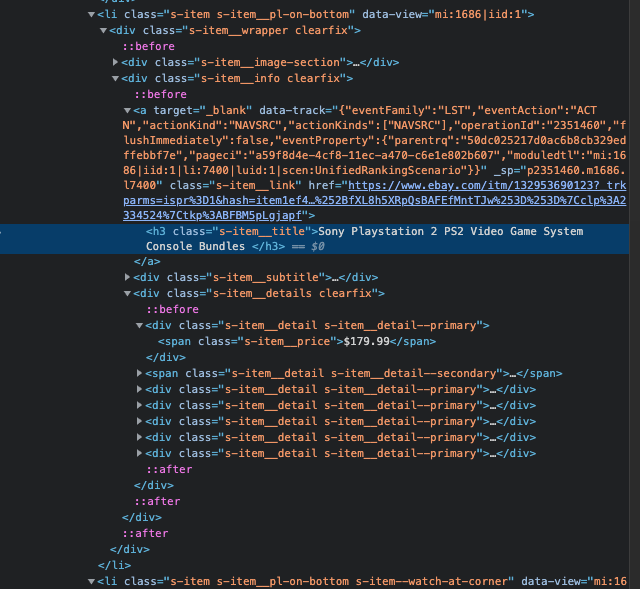
It is time to inspect the web page and to determine which information is subject to scraping. Open the target webpage in your browser. Here is the eBay link, used in our example.
You will see a list of Sony PlayStation products, as defined by the search parameters. See the screenshot:
Each related product needs to be scraped for the following components:
- Name
- Price
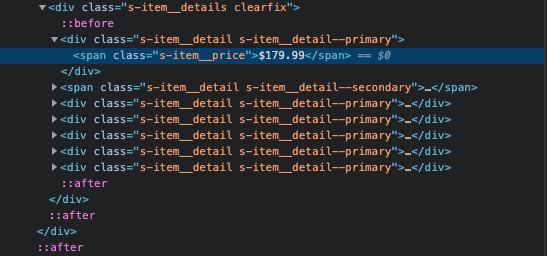
Extract these components with XPath. By studying the webpage closely you should be able to determine the following XPaths Headings and Descriptions. (Don’t worry, URLs will be explained further in the tutorial)
Name: HTML/body/.srp-results .s-item__info/.s-item__title
Description: HTML/body/.srp-results .s-item__info/.s-item__price
The elements have to be listed in a specific order to make the Xpaths extraction possible. Start from the HTML tag and continue till you reach the element that contains the data you seek. See the screenshot, provided below:
Obviously, should you try to process all the information manually, you would have to open each advertisement separately and retrace all the steps. You surely can, but you don’t have to. To avoid this tiresome process, simply create a GetProducts() function that will parse all your searched products. In such a manner, the GetHtml() function will return all the HTML content and all the relevant products will be parsed with the help of (.srp-results) class and CssSelect() function.
Here is an illustration of a GetProducts() function.
static List<Product> GetProducts(string url){
  List<Product> result = new List<Product>();
  var html = GetHtml(url);
  var products = html.CssSelect(".srp-results .s-item__info");

  foreach (var product in products) {
    try {
      var name = product.CssSelect(".s-item__title");
      var price = product.CssSelect(".s-item__price");

      if (name.Count() == 1 && price.Count() == 1) {
        var newProduct = new Product();
        newProduct.price = price.Single().InnerHtml;
        newProduct.name = name.Single().InnerHtml;
        result.Add(newProduct);
      }
    } catch (InvalidCastException e) {
      Console.WriteLine("error");
    }
  }

  return result;
}
In order to retrieve all information about products on page use the following GetProducts() function:
var scrapedData = GetProducts("https://api.rocketscrape.com?apiKey={{YOUR_API_KEY}}&url=https://www.ebay.com/sch/i.html?_from=R40&_trksid=p2499334.m570.l1313&_nkw=sony+playstation&_sacat=0");
With this code, you will now be able to extract the name and the price from each product.
First of all, create a new class called Product, that will contain the scraped data. Next, you should specify two properties to store the values of name, price.
public class Product {
  public string name { get; set; }
  public  string price { get; set; }
}
Exporting data into CSV format
Now we need to convert the received data into a suitable format, that we can work further with. We suggest the CSV format as it is considered to be the most convenient one for similar purposes. You may do this with a tool called CsvHelper, that can be downloaded and installed with a NuGet package.
Use the VS code terminal to execute the following command and install CsvHelper.
dotnet add package CsvHelper
Then, import dependencies into the Program.cs file as provided in the example.
using System.IO;
using System.Globalization;
using CsvHelper;
Afterwards you will be able to convert the information obtained from the web scraping into a CSV format. To do so, simply add the ExportProductsToCsv() function. Make sure that the WriteRecords() function, that undertakes the task of writing the scraped data into a CSV file, is enclosed within. In our example, the name of the CSV file is generated using the keyword, date and time of its creation.
static void ExportProductsToCsv(List<Product> lstProductDetails){
      using(var writer = new StreamWriter($@"/Users/guest/Desktop/ScrapySharp_scraper/CSVs/_{DateTime.Now.ToFileTime()}.csv"))
      using(var csv = new CsvWriter(writer, CultureInfo.InvariantCulture)) {
        csv.WriteRecords(lstProductDetails);
      }
    }
We’re almost done. Let’s implement this method inside the Main function in order to pass the list containing scraped data.
static void Main(string[] args)
 {
    var scrapedData = GetProducts("https://api.rocketscrape.com?apiKey={{YOUR_API_KEY}}&url=https://www.ebay.com/sch/i.html?_from=R40&_trksid=p2499334.m570.l1313&_nkw=sony+playstation&_sacat=0");
    ExportProductsToCsv(scrapedData);
 }
The entire code snippet
using System;
using System.Collections.Generic;
using HtmlAgilityPack;
using ScrapySharp.Extensions;
using ScrapySharp.Network;
using System.IO;
using System.Globalization;
using CsvHelper;

namespace ScrapySharp_scraper {

  class Program {
    static ScrapingBrowser _scrapingbrowser = new ScrapingBrowser();

    static void Main() {
      var scrapedData = GetProducts("https://api.rocketscrape.com?apiKey={{YOUR_API_KEY}}&url=https://www.ebay.com/sch/i.html?_from=R40&_trksid=p2499334.m570.l1313&_nkw=sony+playstation&_sacat=0");
      ExportProductsToCsv(scrapedData);
    }

    static List<Product> GetProducts(string url){
      List<Product> result = new List<Product>();
      var html = GetHtml(url);
      var products = html.CssSelect(".srp-results .s-item__info");

      foreach (var product in products) {
        try {
          var name = product.CssSelect(".s-item__title");
          var price = product.CssSelect(".s-item__price");

          if (name.Count() == 1 && price.Count() == 1) {
            var newProduct = new Product();
            newProduct.price = price.Single().InnerHtml;
            newProduct.name = name.Single().InnerHtml;
            result.Add(newProduct);
          }
        } catch (InvalidCastException e) {
          Console.WriteLine("error");
        }
      }

      return result;
    }

    static void ExportProductsToCsv(List<Product> lstProductDetails){
      using(var writer = new StreamWriter($@"/Users/guest/Desktop/ScrapySharp_scraper/CSVs/_{DateTime.Now.ToFileTime()}.csv"))
      using(var csv = new CsvWriter(writer, CultureInfo.InvariantCulture)) {
        csv.WriteRecords(lstProductDetails);
      }
    }

    static HtmlNode GetHtml(string url){
      WebPage webPage = _scrapingbrowser.NavigateToPage(new Uri(url));
      return webPage.Html;
    }
  }

  public class Product {
    public string name { get; set; }
    public  string price { get; set; }
  }
}
Congratulations, you have managed to create a web scraping project in C# programming language, with the help of ScrapySharp NuGet package. You have also performed a successful web scraping procedure, converting its results into a CSV format along the way. Don’t hesitate to revisit this tutorial anytime to similarly scrape any other webpage you need for your project.